An application can span across multiple environments within your infrastructure, but have an almost identical desired configuration. The following topic describes how to arrange nodes into environments and node groups appropriately, as well as how to utilize Environment Variable Overrides. If you are managing an application through various environments (e.g. UAT, staging, pre-prod, production) you may like to enforce that the configuration of your application is correct through each stage. However, due to the subtle differences between each environment, some slight changes to configuration are sometimes required.
This topic describes a simple web server and database application that exists through a development, staging, and production life cycle. We want to monitor the configuration of each of the instances of the application through the various environments with the same policy, but have automatic overrides depending on the environment a node exists in. In particular, this guide will:
-
Describe the application architecture and some basic configuration we would like to monitor
-
How to arrange these nodes into appropriate Node Groups and environments in Cloudhouse Guardian
-
How to create Environment Variable Overrides for each environment
-
How to create a simple Policy that can be applied to each Node.
Note: It is also possible to define Node Group Variable overrides. When defining multiple variable overrides across environments and nodes, you can also define a priority or precedence order.
Application Architecture
For the purpose of this guide, we are going to use a single web server node connected to a database. The web server could be a Linux VM running Apache web server and the postgres.
The web server node will be a Linux VM running, Apache web server, for example and the database node will be a postgres server, for example. This application is deployed into two environments: development, staging and production. The table below outlines the hostnames of each of the six nodes.
|
Environment |
Web Server Node |
Database Node |
|---|---|---|
|
development |
|
|
|
staging |
|
|
|
production |
|
|
Arrange Nodes into Node Groups and Environments
Assuming that each of the six nodes have been added to the Guardian interface, we are first going to arrange them into their respective environments. For assistance on adding a new environment, please refer to our guide on Add Environment.
Since the development and staging nodes are names with a particular suffix, when adding the new environments, you could also specify the following node rules so that nodes can be automatically assigned to the correct environment.
|
Environment |
Node Rule |
|---|---|
|
Development |
|
|
Staging |
|
Note: We cannot define node rules for the production nodes in this scenario as the production nodes in our environment do not have a common naming suffix. We will have to edit these nodes individually to transfer them from the 'Default' environment to the Production environment.
We will next need to assign nodes into node groups. Nodes can belong to one or more node groups, and all nodes are assigned into the 'All Nodes' node group by default. An eventual policy we create later, must be assigned to a node group, so we're going to segment nodes into groups based on the common policy they should have applied to them. Here, we could create the following node groups for the corresponding reasons:
|
Node Group |
Member Nodes |
Reason |
|---|---|---|
|
Web Servers |
|
We may have common attributes we would like to enforce across identically web servers. |
|
Databases |
|
We may have common table structure or configuration we want to validate across all databases. |
|
Applications |
all 6 nodes |
Not so much for policy assignment, but we may want to report on the compliance and health of all six nodes as a group. |
For more information about creating node groups and adding nodes to a node group, please refer to our guide on Node Groups.
Create Environment Variable Overrides
In this scenario, we are eventually going to write a policy that checks that the IP address of the corresponding DB server is correct for each web server. Instead of writing three separate policies for web server nodes in each environment, we can write a single policy and use environment Variable Overrides to look for the correct value depending on the environment.
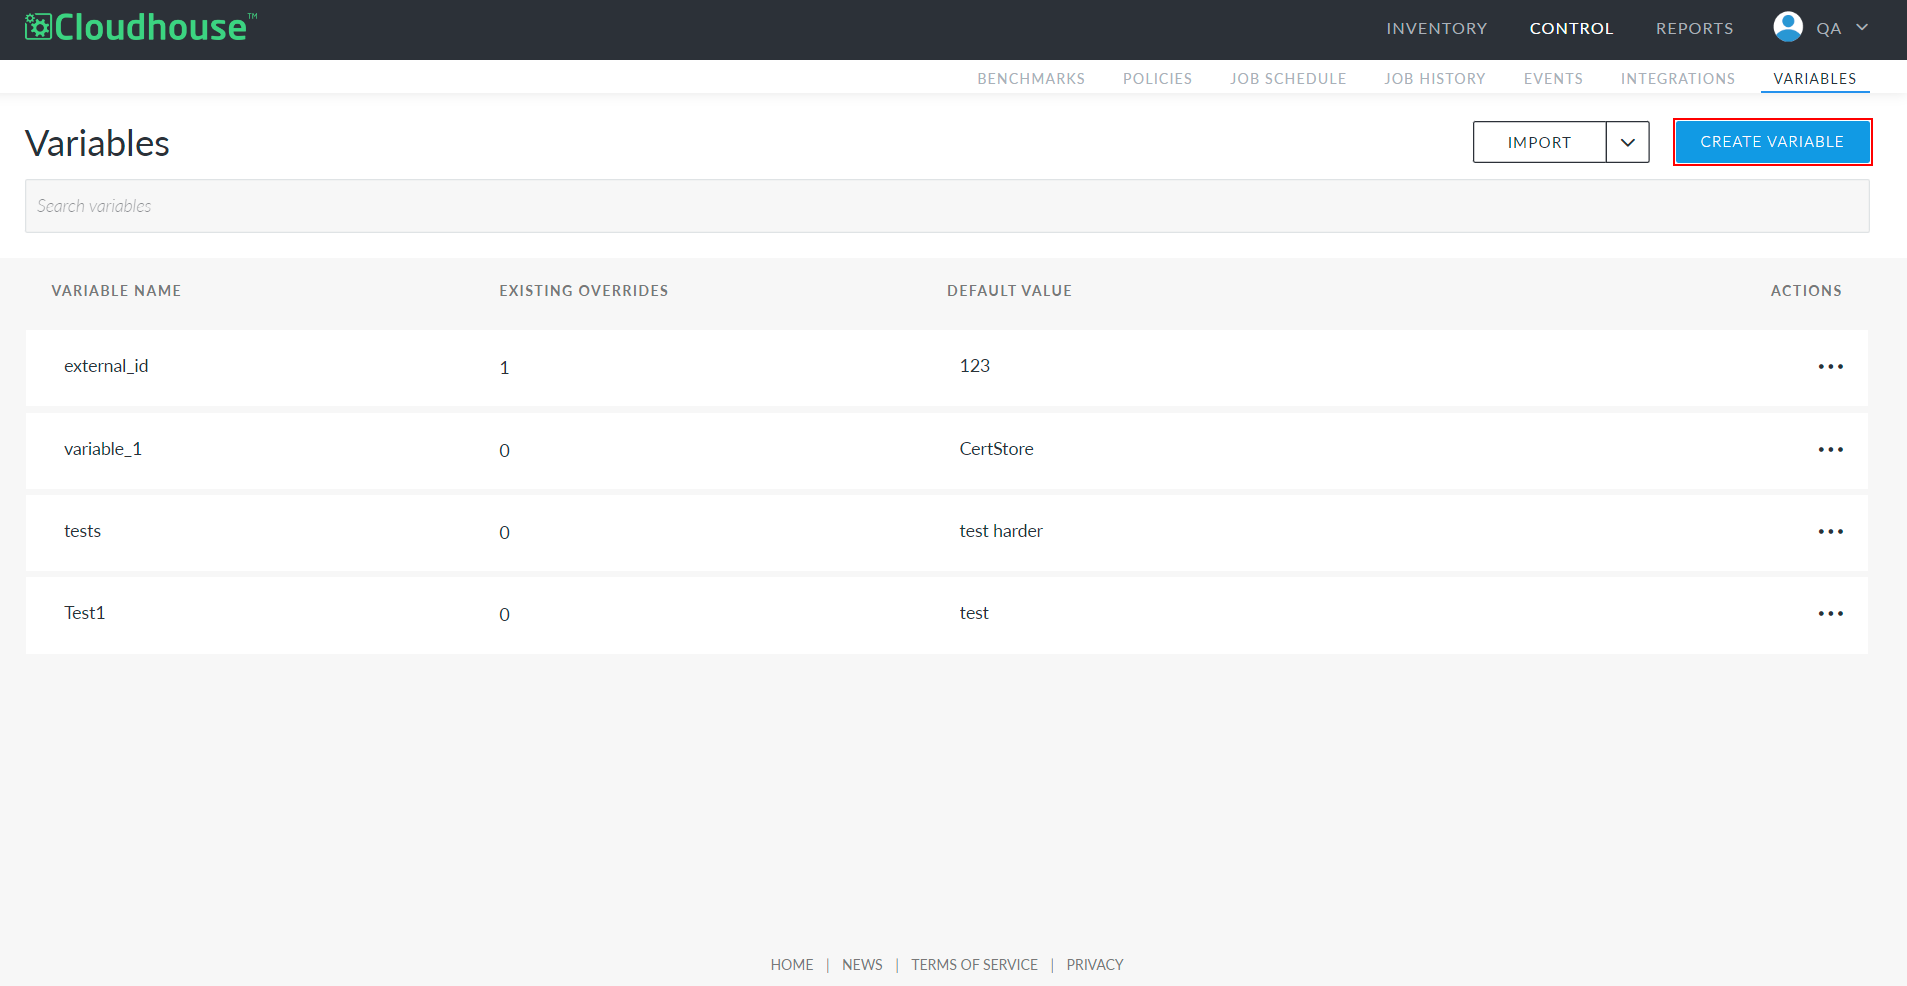
To create a new variable, complete the following steps:
-
Navigate to the Variables tab (Control > Variables)
-
Then, click to Create Variable.
Here we're going to have a variable called database_ip and we're going to set a default value of 192.168.1.1. For this particular scenario, it might be good practice to set the default value of a variable to the value associated with the Development environment and then only supply overrides for staging and production. Click Save Variable.
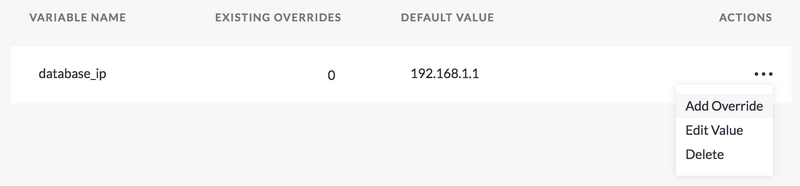
Next, we need to define variable overrides for the other environments. To add a variable override, locate the variable, click on the menu for the variable on the right-hand side and click Add Override.
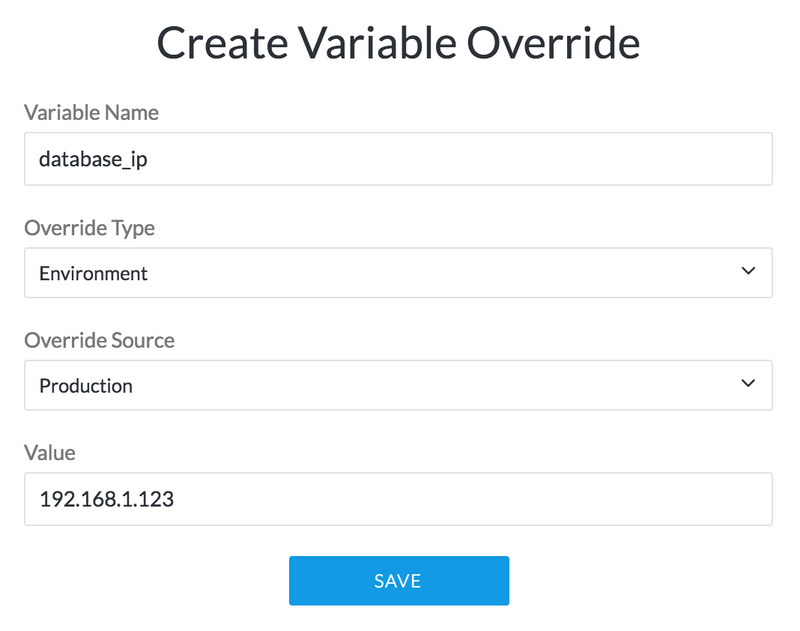
In the screenshot below, we are defining an 'Environment' type of override, on the environment Production and we're going to use the override value 192.168.1.123
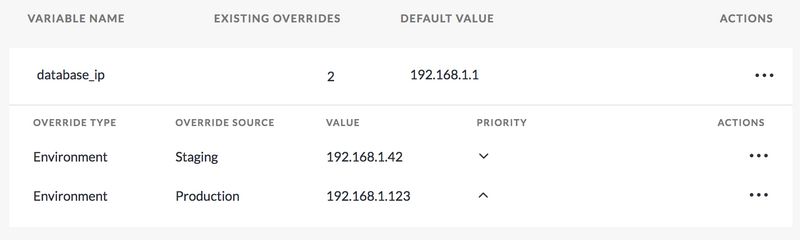
After adding a second variable override for the Staging environment, you should see the variable listed alongside the overrides for each subsequent environment.
Use the Variable and its Overrides in a Policy
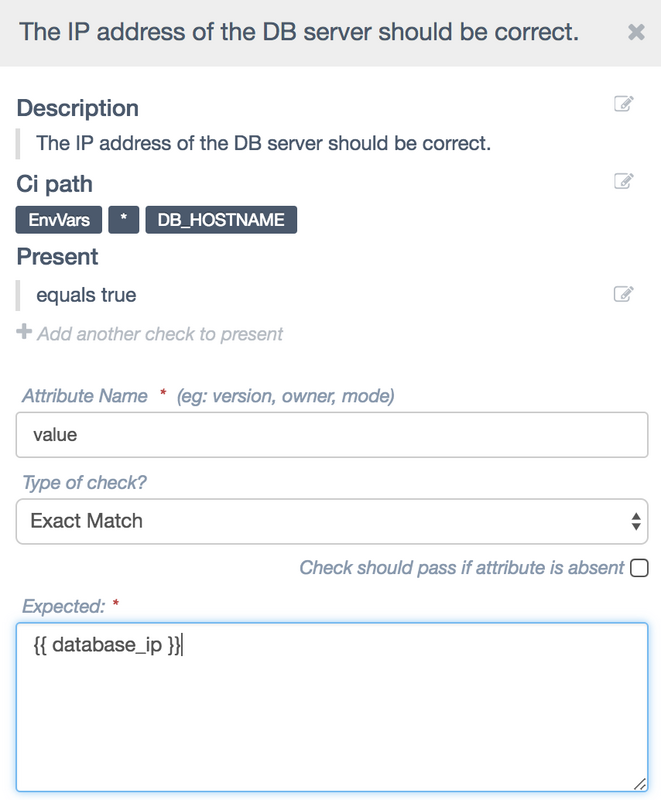
On each of the web server nodes, the IP address of the associated database is defined for the application in an environment variable called DB_HOSTNAME. Here, we can create a new policy check that applies to the CI path EnvVars > * > DB_HOSTNAME. We want to check that the value of this environment variable on each node has a value matching the variable (with any overrides applied). The screenshot below shows how to configure this type of check. We define the attribute name as Value as we want to check the scanned environment variable's value. We would like the Value attributes value to have an Exact Match with the value stored in our variable. We substitute out variable into the expected value by using the mustache curly brace syntax.
After creating this policy check we would next navigate to the web server node group via the Monitored tab (Inventory > Monitored) page and then assign this policy to the web servers node group. For more information on adding a policy to a node group, please refer to our guide on Policies.
The next time any of the nodes in the web servers node group is scanned, the policy will be applied and the proper variable value and any overrides will be properly substituted in.